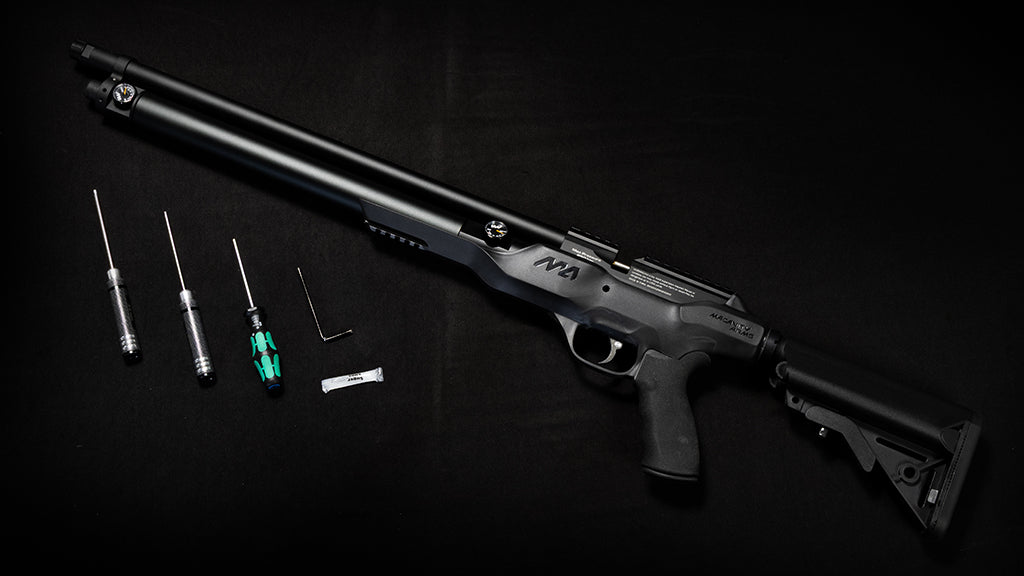
At Macavity Arms, we’re committed to helping you keep your MA2 PCP air rifle performing at its best, and that includes making upgrades easy and accessible. The upgraded MA2 Gen2 air cylinder and regulator chamber assembly is designed to enhance the reliability of your rifle and minimize potential issues over long-term use. If you’re ready to upgrade your MA2, we’ve created a step-by-step video tutorial to walk you through the entire process.
📽️Watch here: How to Replace the MA2 Gen2 Air Cylinder and Regulator Chamber
Tools You Will Need
Before you begin, make sure you have the following tools ready:
- Allen keys: 2mm, 2.5mm, 3mm, 4mm
- 24mm wrench or a monkey wrench
- Long soft-tipped rod (such as the MA2 barrel or the back of a long screwdriver)
- Soft-jawed pliers (optional)
- Gas tank or any gas-filling equipment capable of pressurizing up to 2000 PSI.
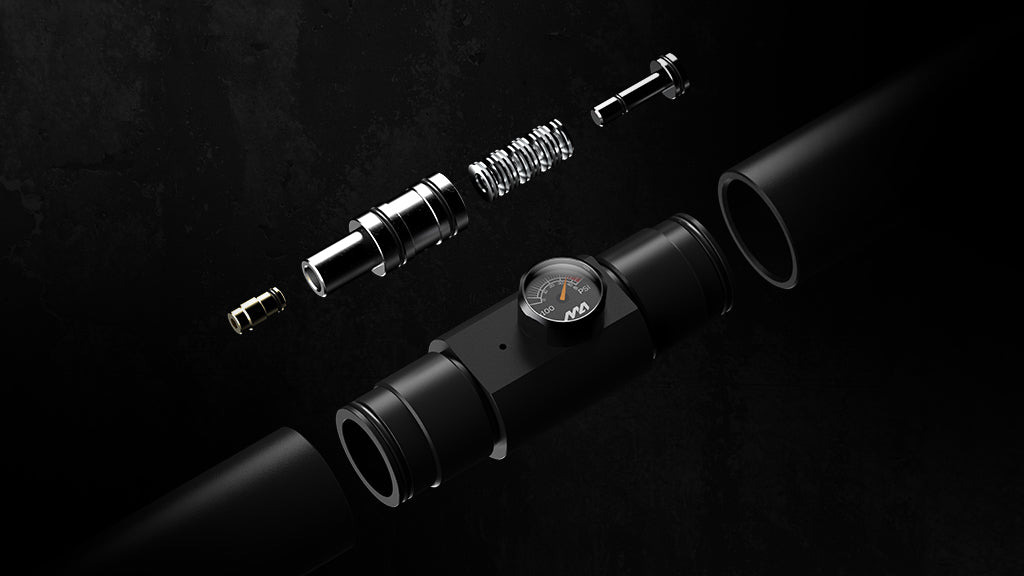
Steps Covered in the Video
Tutorial video covers each step of the replacement process in detail:
- Step1: Degas the airgun
- Step2: Remove the stock
- Step3: Remove the barrel band
- Step4: Remove gauges and air cylinder
- Step5: Extract the regulator
- Step6: Install regulator into new chamber
- Step7: Assemble the new cylinder kit
- Step8: Reinstall the gauges
- Step9: Reinstall the barrel band
- Step10: Final assembly
By following the steps in the video, you can confidently complete the upgrade at home and enjoy the benefits of improved durability and performance from your MA2.
If you have any questions after watching, don’t hesitate to contact our support team at cs@macavityarms.com, or speak with your local airgun dealer for additional assistance.
Thank you for choosing Macavity Arms, and happy shooting!
Dejar un comentario
Este sitio está protegido por hCaptcha y se aplican la Política de privacidad de hCaptcha y los Términos del servicio.